

It’s that magical time of year in the Northern Hemisphere. Cool mornings with lakes producing fog, warm afternoons creating a wonderful opportunity to get out and enjoy nature’s last stand before winter and warm afternoons.
The trees are changing colour and photographers everywhere are trying to capture the color palettes of one of nature’s most spectacular displays.
Most people use point and shoot digital cameras with tiny sensors and say they cannot get the true fall colours. I’m a professional photographer, not a scientist, so I don’t really know why fall colours taken with a point and shoot camera look so much worse than those taken with a professional DSLR, and even those don't look as good as film, but I’ve learned a few tricks for making my fall photography look better regardless of which camera I'm using.

Try the effects of the polarizer, but be careful if you're using a wide-angle lens and the sky is blue. With very wide lenses, you may see differing amounts of saturation in the sky across the frame which looks unnatural. It occurs because the sky isn't evenly polarized. With a long lens (and a corresponding small angle of view), this effect is much less noticeable.
Shoot in the shade. Your eyes are so much more sensitive to colour range than your camera. You are tricked into thinking you see a good photo just because you see a pleasing view. When the leaves are sunlit, they are often so bright that the sensor cannot record the subtle colours and instead records washed-out highlights. The reason is that the colours reflect the light and all the sensor sees is a bright light. In the shade, natures colours – be it spring flowers or autumn leaves – are revealed to the sensor in a much more manageable hue. Those cloudy days or shady hillsides often result in better photos.
If you are shooting in sunlight, catch the "golden light" in the mornings and evening. Direct sunlight in the middle of the day gives overly harsh, high contrast images. The air is clearest in the morning and after rain, so these can be really good times to shoot.
Crop other colours into the frame. Cameras and the human eye have one thing in common: colour is relative, not absolute. When you include other colours in the frame, it changes how the sensor and the viewer’s eye records or perceives the colour. Think of it this way, too much of a good thing can be too much eye candy in one photo.
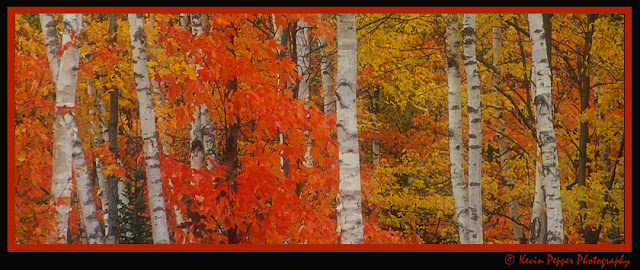
Include compositional elements, not just the leaves. Including singular evergreens amidst a forest of leaves, small meadows, a stream, or even a road or trail in the frame can often help your camera record a memory and an emotion rather than a just a photograph. Don’t take the photo, make it!
Don't be afraid to use a telephoto lens to pick out detail in the landscape as well as wide angle lenses when there is a lot of color
If the sky is grey and overcast you can still get good foliage shots, but you may want to minimize the amount of sky you show. Zoom in on the trees and save the sky shots for days which have clear blue skies.
If your camera allows you to adjust saturation, you might want to increase it slightly to richen the colors.
If your camera supports a "vivid" color mode (most cameras do), then try that to punch up the colors.
As I prepare for my next workshop up near Algonquin Park
No comments:
Post a Comment